# Planted Aquarium Substrate Layers and How to Build a Proper Foundation The first time I built a layered substrate, I ended up with what looked like a geological survey gone wrong. Brown soil bleeding into grey gravel, cloudy water for a week, and plants that seemed more confused than rooted. That was three years ago, and I’ve learned the hard way that getting your substrate right isn’t about following a recipe.
It’s about understanding what each layer actually does and why your plants need more than just somewhere to stick their roots. I’ve rebuilt substrate systems half a dozen times since then, each time getting closer to something that actually works long term. The internet is full of advice that sounds precise but falls apart when you’re standing there with bags of different materials, wondering if you’ve just spent sixty quid on something that’s going to turn into a muddy mess.
This isn’t that kind of advice. This is what I wish someone had explained to me when I was googling “why is my substrate floating” at two in the morning. | **Aspect** | **Detail** | |————|————| | Base Layer Depth | 1-2 inches nutrient rich | | Middle Layer Size | 3-7 mm larger grains | | Top Layer Size | 1-2 mm fine gravel | | Total System Depth | 3-4 inches typical | | Typical Coverage | 5.8kg for 100L tank | | Our Rating | Essential foundation skill | ## Why Layered Substrates Actually Matter The whole point of layering substrate isn’t to make your tank look fancy from the side.
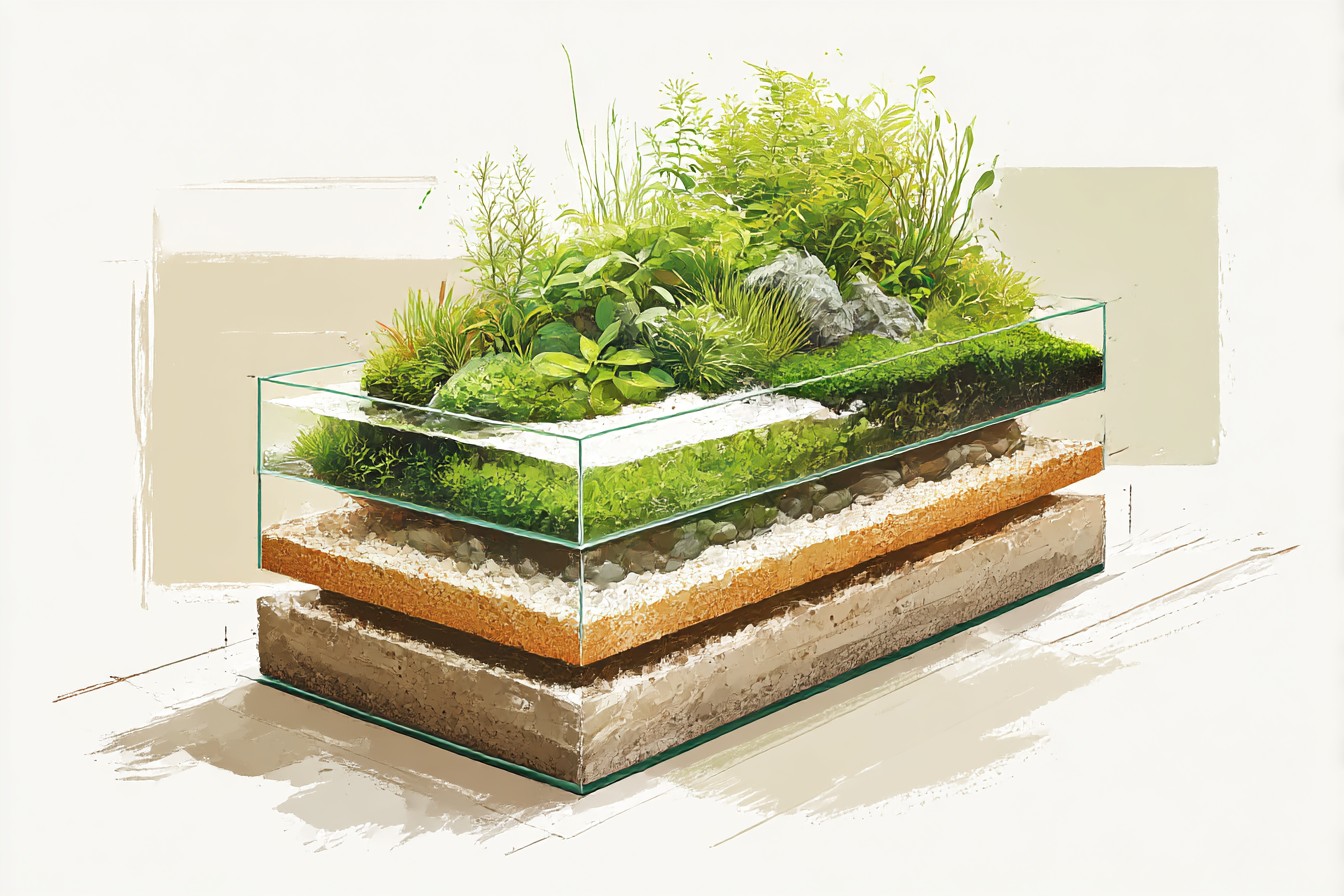
It’s about creating different zones that do different jobs over the months and years your tank is running.
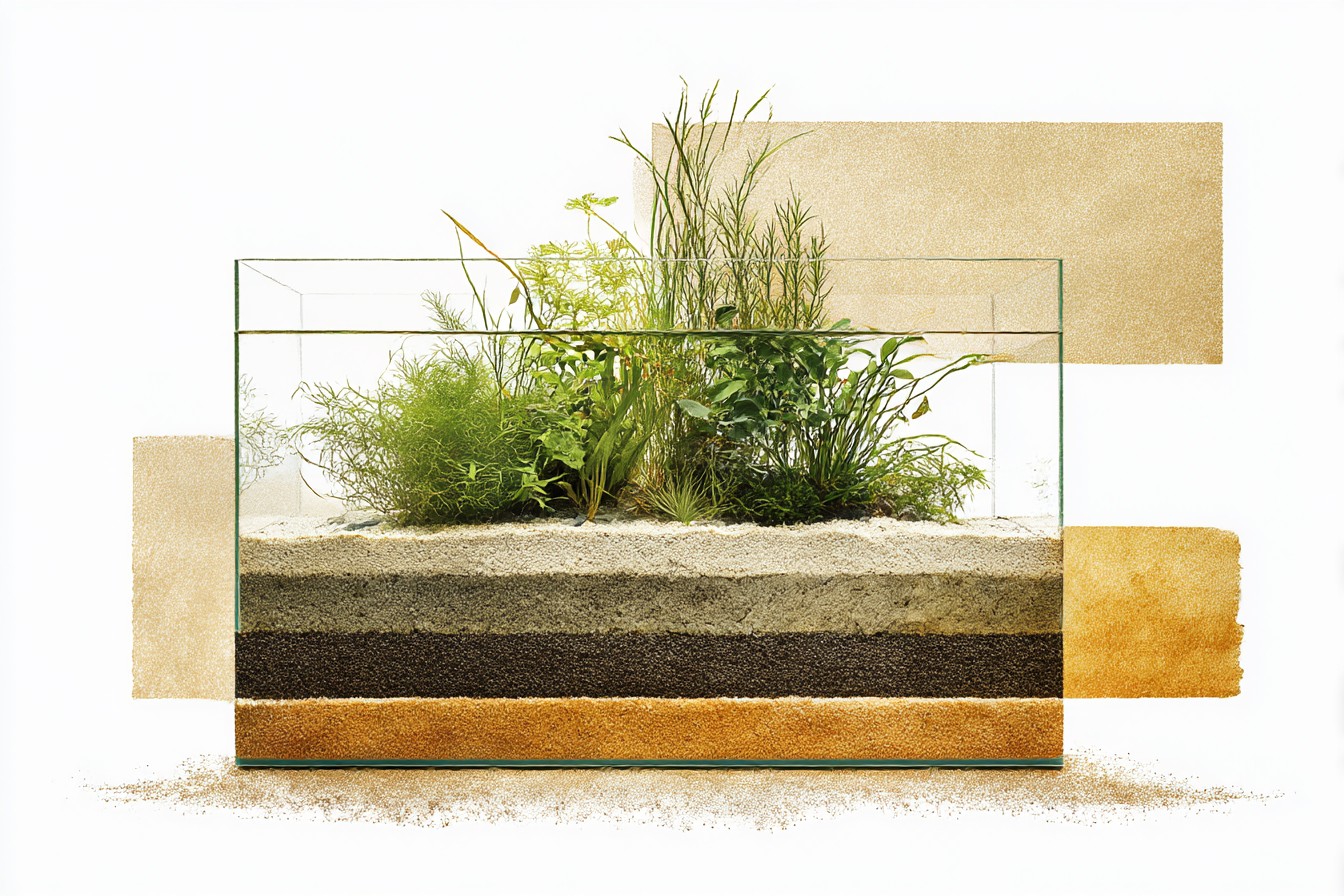
Plants don’t just need somewhere to anchor. They need access to nutrients, but they also need those nutrients to stay where they’re meant to be instead of dissolving into your water column and feeding algae instead. A proper layered system gives you nutrient storage at the bottom where plant roots can access it, mechanical filtration in the middle to prevent that nutrient layer from migrating upward, and a clean cap on top that looks good and doesn’t cloud your water every time a fish decides to redecorate.
The base layer often recommended at 1 inch (Fish Keepers Guide) provides the foundation, but that’s just the starting point. The middle layer acts like a buffer zone. Larger grain materials, typically 3-7 mm (Healthy Home Aquarium), create spaces for beneficial bacteria while preventing fine particles from the nutrient layer below from working their way up.
Without this layer, you end up with nutrient rich soil gradually mixing with your top layer, which means cloudy water and algae problems down the line. Your top layer is what everything sees, but it’s also your first line of defence against substrate disturbance. Fine gravel at 1-2 mm (Healthy Home Aquarium) gives you that clean look while being fine enough that plant roots can push through easily but heavy enough that it doesn’t shift around every time you do maintenance. ## Building the Foundation Layer This is where most people either get it right or spend the next six months dealing with the consequences of getting it wrong.
Your foundation layer is your nutrient bank. It’s what feeds your plants for the first year or two before the tank develops its own nutrient cycle from fish waste and organic matter breaking down. The nutrient base layer should be 1-2 inches thick (IERE), but thickness isn’t everything.
What you put in this layer matters more than how deep you make it. I’ve used commercial aqua soils, homemade clay and peat mixes, and various combinations of both. They all work, but they work differently.
Commercial aqua soils are expensive but predictable. They release nutrients slowly, they don’t turn anaerobic easily, and they’re designed to work with the pH and hardness most tropical plants prefer. Homemade mixes can be brilliant but they’re also where things go sideways if you don’t know what you’re doing.
Too much organic matter and you get hydrogen sulphide production. Too little and your plants starve after a few months. The foundation layer needs to be level, but it doesn’t need to be perfectly smooth.
Small variations actually help with water circulation. What it cannot be is uneven enough to create thick and thin spots, because thin spots become weak points where your middle layer can sink down and your whole system starts mixing together. I learned this the expensive way when I tried to save money by not buying enough base layer material.
The thin spots at the back of the tank gradually developed depressions where the gravel cap sank down, and within six months I had gravel mixed all the way down to the glass. The plants in those areas never grew properly because their roots couldn’t access the nutrients that were now diluted with inert gravel. ## The Critical Middle Layer This is the layer that most beginners skip, and it’s usually what separates substrate systems that work long term from ones that start failing after a few months. The middle layer isn’t just filler.
It’s your insurance policy against the inevitable settling and shifting that happens in any tank. Larger grain materials at 3-7 mm (Healthy Home Aquarium) create a mechanical barrier that prevents fine particles from migrating upward while allowing water and roots to move through freely. This layer doesn’t need to be thick.
The middle layer often recommended at 1 inch (Fish Keepers Guide) gives you enough material to do the job without taking up too much vertical space in your tank. I use a mix of small river stones and larger aquarium gravel for this layer. The key is making sure the grain size is significantly larger than anything in your foundation layer but not so large that your cap layer can autumn through the gaps.
If your foundation layer has particles smaller than 2mm and your cap layer has particles around 2mm, then 5-7mm works perfectly for the middle layer. The middle layer also gives you biological filtration capacity. Those gaps between the larger particles become homes for beneficial bacteria that process ammonia and nitrites.
This means your substrate isn’t just feeding your plants, it’s also helping with your nitrogen cycle. In a well established tank, the middle layer becomes part of your biological filtration system, which is why established substrates tend to be more stable than new ones. Getting the middle layer right means thinking about long term stability, not just initial appearance.
Materials that look good on day one but break down over time create problems later. I’ve learned to avoid anything that’s likely to decompose, like some types of natural stone that are too soft, or recycled materials that might leach unexpected compounds. ## Creating the Perfect Cap Layer Your cap layer is what everything sees, but it’s doing more work than just looking good. It needs to be heavy enough to stay put when fish dig around, fine enough that plant roots can push through easily, and inert enough that it’s not adding unwanted minerals to your water.
You Might Also Like
The cap layer suggested at 1-2 inches (IERE) gives you enough depth to hide the layers below while providing space for beneficial bacteria. Fine gravel at 1-2 mm (Healthy Home Aquarium) hits the sweet spot for most planted tanks. It’s heavy enough to resist disturbance but fine enough that delicate plant roots don’t struggle to penetrate it.
Anything finer than 1mm starts behaving like sand, which looks great but can compact and create anaerobic zones. Anything coarser than 3mm allows too much light through to the layers below, which can promote algae growth in your substrate. The colour of your cap layer affects how the whole tank looks, but it also affects plant growth.
Very light coloured substrates reflect light back up toward your plants, which can actually help with lower light setups. Very dark substrates absorb light and heat, which some plants prefer but which can also promote algae if your lighting is too intense. I’ve used everything from expensive aquarium gravels to thoroughly cleaned natural river gravel for cap layers.
The expensive stuff is guaranteed to be aquarium safe and pH neutral, but natural materials can work just as well if you know what you’re looking for and you’re willing to test them properly. The key is consistency in grain size and chemical inertness. ## Real World Application and Troubleshooting Here’s what actually happens when you build a layered substrate system. You spend a day carefully laying everything out according to the plan, you flood the tank slowly, and for the first few weeks everything looks perfect.
Then the substrate starts settling, the layers start interacting, and you discover whether you’ve built something stable or something that’s going to cause problems. One example system that actually works in practise is laid 2 cm thick plus 2-3 cm gravel cap (UKAPS Guide), with a 5.8 kg tub suitable for a 100 litre aquarium (UKAPS Guide). Those numbers aren’t arbitrary.
They’re based on what actually provides long term stability without using more material than necessary. The settling process happens gradually over the first few months. Your carefully level substrate develops small depressions where the water flow is strongest or where large fish like to dig.
The layers compact slightly as organic matter breaks down and particles find their natural positions. This is normal, but it’s also where poor layer design becomes obvious. If your middle layer is too thin or the wrong grain size, you’ll see mixing between your foundation and cap layers.
Dark spots appearing in light gravel, or light spots appearing in dark gravel, are usually signs that your layers are migrating. If your cap layer is too thin, you’ll see nutrients bleeding into the water column, which usually shows up as unexplained algae growth even when your fertilisation and CO2 are dialled in properly. The most common mistake I see is treating substrate layering like a one time setup that never needs attention.
Even the best designed substrate system needs minor maintenance over time. Adding a bit more cap layer material during major rescapes, gently levelling areas that have developed depressions, and occasionally stirring the middle layer to prevent compaction all help maintain the system long term. ## When Simple Works Better Not every planted tank needs a complex layered substrate. Some of the most successful tanks I’ve seen use nothing more than a quality aqua soil with a thin sand cap, or even just a single layer of the right material.
The decision to use layers should be based on what you’re trying to achieve, not on what looks most complicated. Simple single layer systems work well for tanks with heavy fertilisation regimes, where you’re providing most nutrients through the water column anyway. They work for tanks with plants that are primarily water column feeders rather than heavy root feeders.
And they work for people who prefer to replace substrate entirely every few years rather than trying to maintain a complex system indefinitely. Layered systems make sense for tanks where you want the substrate to do most of the nutrient heavy lifting, for tanks with plants that are primarily root feeders, and for people who want to establish a system that can run for years without major substrate work. They also make sense if you’re dealing with very soft water where nutrient leaching from the substrate could cause pH swings.
The top decorative layer often recommended at 1 inch (Fish Keepers Guide) in most guides assumes you want that decorative element, but there’s no law that says your cap layer has to be decorative. Some of the most successful planted tanks use functional cap layers that do their job without trying to be the visual centrepiece. ## The Long Game A properly built layered substrate system should improve over time, not degrade. The first few months are about establishment and settling.
The first year is about the system finding its equilibrium as organic matter accumulates and beneficial bacteria populations stabilise.
After that, a good substrate system becomes a living ecosystem that’s actively contributing to tank stability. I’ve got one tank running on a layered substrate that’s now two years old, and it’s noticeably more stable than it was in the first six months.
The plants grow more consistently, the water parameters stay steadier, and maintenance is actually easier because the system has developed its own balance. That doesn’t happen by accident. It happens when the layers are doing their jobs properly and supporting each other over time.
The biggest lesson I’ve learned from building substrate systems is that the upfront effort pays dividends later, but only if you understand what you’re building and why. Following layer thickness recommendations without understanding what each layer does is like following a recipe without understanding cooking. You might get lucky, but you’re more likely to end up with something that works poorly and fails unpredictably.
Building substrate layers properly isn’t rocket science, but it’s not foolproof either. It’s one of those aspects of aquascaping where taking the time to understand the principles saves you months of frustration later. And when you get it right, when your plants are thriving and your water is crystal clear and your substrate is doing exactly what it’s supposed to do, you understand why people get obsessive about this stuff.